Setup Stream Overlays & Stream Alerts for Twitch, OBS & major platforms
Full Stream Overlays Setup Video
Check out our video on how to easily set up your new stream overlays including using one-click setup for Streamlabs or StreamElements and how to install your OBS or Streamlabs Desktop scenes. We've broken down each section in the article below. Looking for more stream overlays and free stream overlays? Head back to Elements below.
Alerts
Check out our alert setup instructions for both Streamlabs and Streamelements.
Scenes
Here you'll find everything you need to get your scenes setup in OBS Studio and Streamlabs.
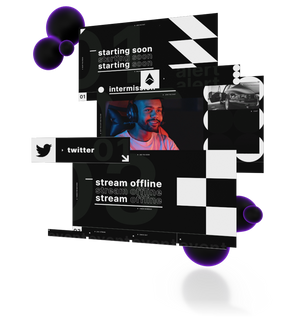
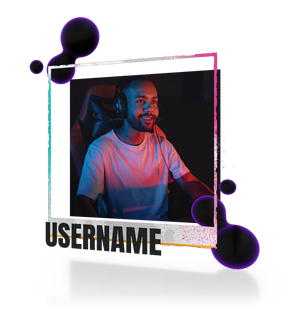
Overlays
Looking for how to get your new cam box and event bars working? That's here.
One Click
Our packages include one click setup for Streamlabs and Streamelements.

Welcome to GETREKT Elements
Welcome to our written tutorial on how to get setup after you receive your GETREKT Pack. For the people that prefer to read their instructions, we’ve compiled all of your instructions into 1 page. Click the links in the table of contents to navigate to where you want to be.
We'll update this page regularly as per store updates, but if this guide can’t help you please join our discord for live support.
1. Alerts
Streamelements
1. Start by logging into your streamelements account.
2. Download and unzip the folder from your dashboard
3. Find the folder named Alert_One_Click
4. Find the platform you need and double click on the shortcut.
5. This will automatically add it onto your account overlay list. Find that by clicking on overlays in the left dashboard panel.
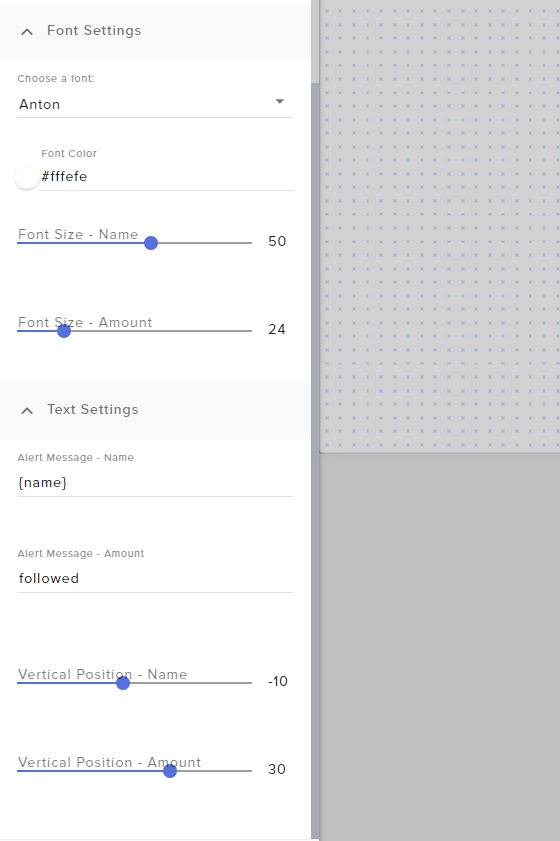
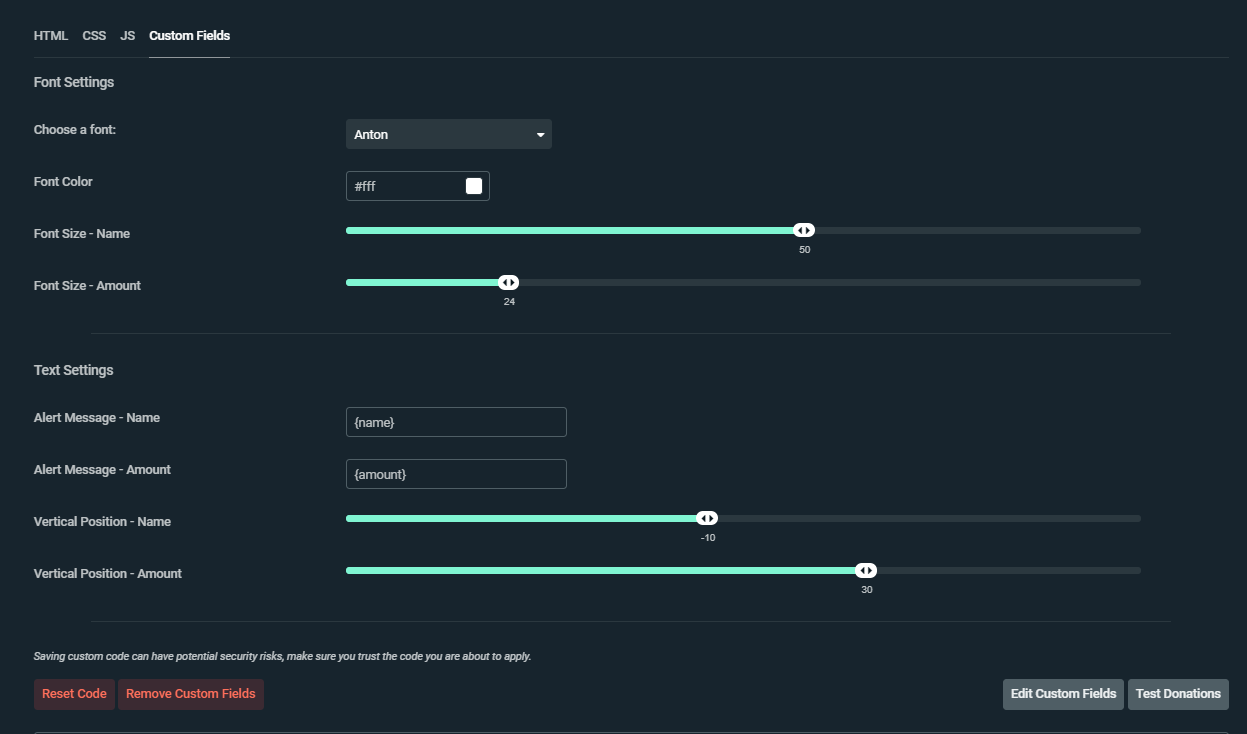
6. These One-Click alertboxes come with custom code that contain our recommended use case of the alerts; designer recommended font and splitting of name and amounts data to 2 lines for all alerts.
---Google Font, Font colour, Top & Bottom line vertical placement can also be changed for preference.
7. If you would prefer to use the default streamelements alertbox, just create a new one and add the files in.
8. To test the alerts, locate the small panel in the bottom center of the screen, click on emulate, and test all the alerts out. Note you can do custom alerts here.
9. When you are happy, click on the link icon in the top right corner (copying the link for the overlay) and paste it into a browser source in your streaming program.
10. Our alerts are designed to be 960x540, so make sure to set your browser source to that resolution if you are using our one-click alertboxes.
If you are using OBS.Studio, create a browser source, set it to 960x540, then paste the link provided by Streamelements.
If you are using Streamlabs Desktop, you can do the same as OBS.Studio, create a browser source, set resolution to 960x540, then paste the link provided.
Streamlabs
1. Start by logging into your streamlabs account.
2. Download and unzip the folder from your dashboard
3. Find the folder named Alert_One_Click
4. Locate the SL Animated/Static Alerts and double click on the shortcut
5. This will bring you to your streamlabs account, with an option to replace one of your themes. Scroll to the bottom and select Create next to “Create a new Widget Theme”.
6. Name the theme what you’d like, and click on Create again.
7. This will return you to the previous popup with all your current streamlabs themes, select the new one you just created. This will save our alertbox over the new theme you just created.
8. While in the themes menu, make sure the new theme you created is the active theme, and select the correct scene collection if you you are using this on streamlabs.
9. These One-Click alertboxes come with custom code that contain our recommended use case of the alerts; designer recommended font and splitting of name and amounts data to 2 lines for all alerts.
---Google Font, Font colour, Top & Bottom line vertical placement can also be changed for preference.
10. If you would like to to customize the alerts, you can do so in browser or in the streamlabs desktop app (assuming the correct theme is set to the correct scene collection)
11. When you are happy you can head back to themes while in browser, locate and click the link icon, followed by the clipboard icon next to Alertbox in the following popup window, and paste this as a 960x540 browser source in your streaming app.
--If you are using OBS.Studio, create a browser source, set it to 960x540, then paste the link provided by Streamlabs.
--If you are using Streamlabs Desktop, you can do the same as OBS.Studio, or create and alertbox in app, set the resolution to 960x540 and move to preference.
2. Scene Setup
OBS.Studio
1. Download and unzip the folder from your dashboard
2. Open OBS.Studio
3. In the top toolbar, locate Scene Collections, followed by Import.
4. At the bottom, click on Add, and locate the unzipped folder.
5. Click on the JSON file related to your package.
6. Click on Scene Collections again, find your new scene collection, and select it.
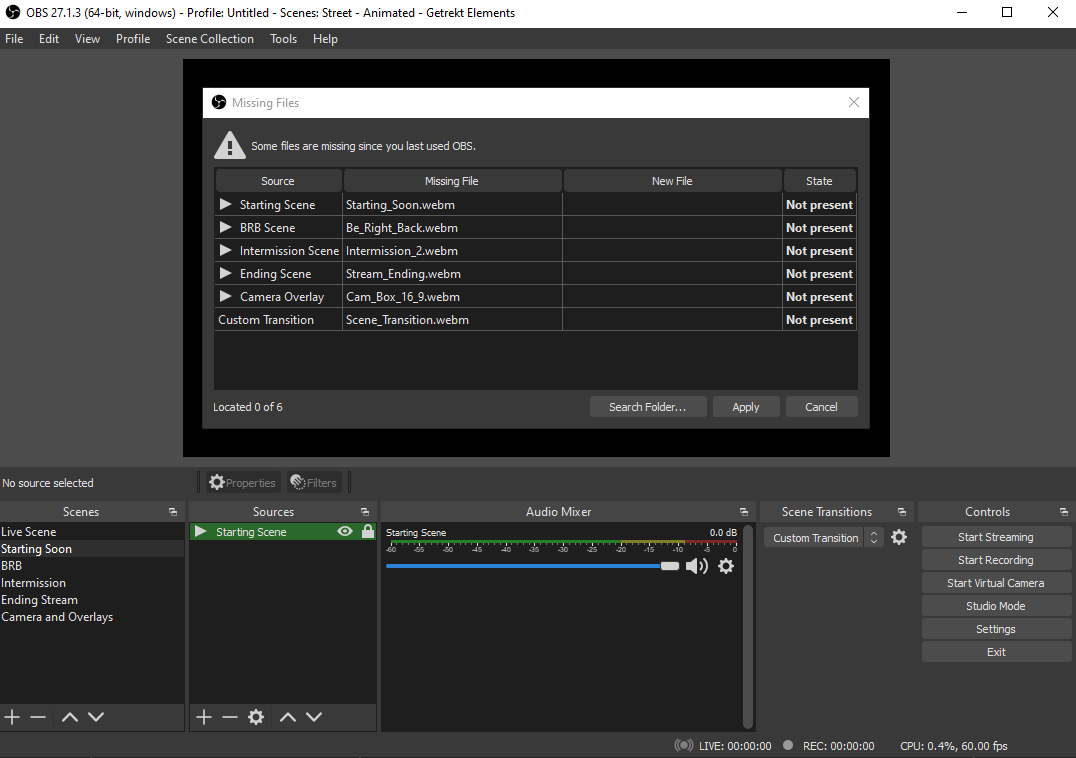
7. OBS will open a missing filed popup, click on the 3 dots to locate the folder they are in. If files are in the same folders, it should locate them all. When all files are located click on apply, and everything should load with your new Elements assets.
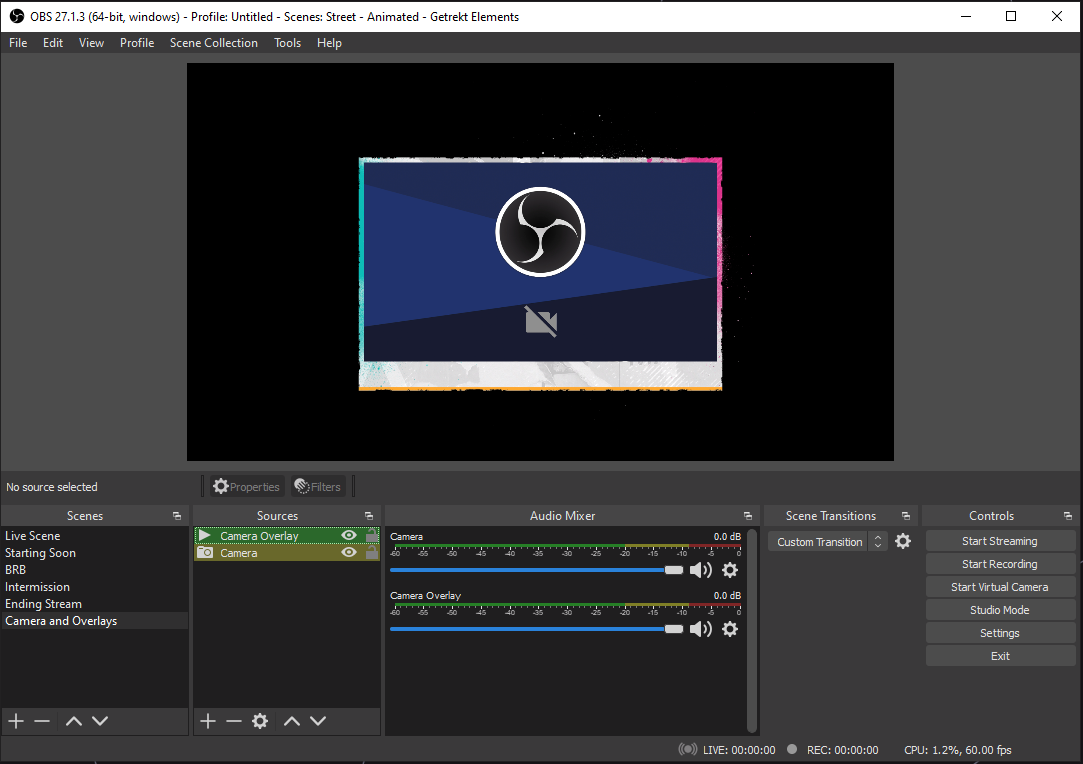
8. Camera and Overlay is a scene that is used in Live Scene to group the overlay and camera together. Head over to that scene and point the camera source to your one.
9. Head back to Live Scene and add your game/capture card source into the bottom layer.
10. If you will be using an intermission screen, with a chat box, there is a browser source available that you can add your preferred chatbox from (SE or SL).
Streamlabs Desktop
1. Download and unzip the folder from your dashboard
2. Open Streamlabs Desktop
3. Go to Settings by clicking the gear icon in the bottom left.
4. Locate and click on Scene Collections, then Import
5. Find the .OVERLAY file in your unzipped folder.
6. All of the assets should already be loaded.
7. Camera and Overlay is a scene that is used in Live Scene to group the overlay and camera together. Head over to that scene and point the camera source to your one.
8. Head back to Live Scene and add your game/capture card source into the bottom layer.
9. If you will be using an intermission screen, with a chat box, locate the chatbox widget by adding a source, and clicking on chatbox.
3. Overlay Setup
OBS.Studio
1. Download and unzip the folder from your dashboard
2. Open OBS.Studio and go to the scene that you want to add your overlay to. If you are using our Scene Collection file, we group both the camera and overlay in a scene named Live Scene, which we then use as a source in another scene.
3. If you are adding the overlay to an existing scene collection:
---Add an image/media source, locate the folder you unzipped, and select the overlay you want to use.
---Add a video source, name it camera, choose your camera, then hold ALT then drag the corners if you would like to crop it to the edges of your border.
4. If you are using our scene collection:
---Go to Camera and Overlays
---Double click on Cam Overlay and replace it with the overlay you would like to use.
---Double click on Camera and select your camera in the dropdown
---Hold ALT and drag the edges of the camera source to crop it to your new overlay.
5. If you have a pack that requires a cam mask, right-click on the camera source > filters. Find (or add) the Mask Filter, and browse for the correct mask in your overlays>masks folder.
Streamlabs Desktop
1. Download and unzip the folder from your dashboard
2. Open Streamlabs Desktop and go to the scene that you want to add your overlay to. If you are using our SL Overlay file, we group both the camera and overlay in a scene named Live Scene, which we then use as a source in another scene.
3. If you are adding the overlay to an existing scene collection:
---Add an image/media source, locate the folder you unzipped, and select the overlay you want to use.
---Add a video source, name it camera, choose your camera, then hold ALT then drag the corners if you would like to crop it to the edges of your border.
4. If you are using our Overlay File:
---Go to Camera and Overlays
---Double click on Cam Overlay and replace it with the overlay you would like to use.
---Double click on Camera and select your camera in the dropdown
---Hold ALT and drag the edges of the camera source to crop it to your new overlay.
5. If you have a pack that requires a cam mask, right-click on the camera source > filters > edit filters. Add the Mask Filter, and browse for the correct mask in your overlays>masks folder.

4. Transition Setup
OBS.Studio
1. Download and unzip the folder from your dashboard
2. Locate your Scene Transitions dock, by default it's located to the left of where your Start Streaming button is.
---If you cannot find it, go to View > Docks > Reset UI to return to the default OBS UI.
3. Click on the drop down, and select Add: Stinger. Name your stinger and click OK.
4. Click on browse, find your new transition in your unzipped folder. Make sure to select the WebM version(with sfx if you prefer that).
---We’ve included a transparent Pro Res 4444 file for anyone that would like to use them for youtube videos.
---You can’t add separate audio for the transitions, if you would like to add your custom audio in (or to adjust the audio), use the mov file provided, add your audio in an editing program, then reconvert to WebM (we recommend using ShutterEncoder)
5. Our transition points are +- 500ms off the center, so setting the Transition Point Type to Time, then Transition Point to 1500ms should get your transition working correctly.
Streamlabs Desktop
1. Download and unzip the folder from your dashboard
2. In the top right corner of your Scenes dock, you’ll see a gear icon that will state Edit Scene Transitions when hovered over. Click on this.
3. Click on Add transition, Name your transition, then select stinger in the dropdown.
4. Click on browse, find your new transition in your unzipped folder. Make sure to select the WebM version(with sfx if you prefer that).
---We’ve included a transparent Pro Res 4444 file for anyone that would like to use them for youtube videos.
---You can’t add separate audio for the transitions, if you would like to add your custom audio in (or to adjust the audio), use the mov file provided, add your audio in an editing program, then reconvert to WebM (we recommend using ShutterEncoder)
5. Our transition points are +- 500ms off the center, so setting the Transition Point Type to Time, then Transition Point to 1500ms should get your transition working correctly.
5. Full Package One Click Instructions
Alerts
1. Download and unzip the folder from your dashboard.
2. Locate the One Click folder in the root of your unzipped folder>Streamelements>Alerts.
3. Making sure you are logged into your Streamelements account, double click on the shortcut for your required platform.
--- Note: To add alertboxes for multiple platforms, make sure you swap across to your other platform inside SE before clicking on the one click setup link.
4. In your SE My Overlay page, you can click on the 3 dots on your new Alertbox>Copy URL, to get the URL for OBS later on.
OBS.Studio
5. Open OBS.Studio
6. In the top toolbar, click on Scene Collections>Import>Add and find the Scene Collections folder located in the unzipped folder; One Click>Streamelements>Scene Collection and select the JSON File.
7. Go back to Scene Collection toolbar>Select your new scene collection.
8. The scene collection importer window will appear (assuming you are on the newest version of OBS, 27+). Click on Search Folder and locate the folder all of your unzipped files are in. It should locate files in the same folder, just repeat the process till it has found all of the files and click Apply.
Putting it together
9. Starting in Live Scene, add your capture card/display/window/game capture source in the bottom layer here.
10. While still in Live Scene, double click on Alerts and add the link generated in step 4. Settings should be pre-set so just click OK, and resize/move to preference.
11. If you want to test alerts, Edit your overlay in Streamelements, find the emulate toolbar in the bottom, select Preview Live, and choose the alert you want to preview.
12. Moving down to the Camera and Overlay scene, double click on camera and select your camera source.
13. Double click on Cam Overlay and choose a different overlay from the unzipped folders if you prefer.
14. Holding Alt and dragging an edge of the camera source in the preview window, will allow you to drag to crop your camera to fit your camera perfectly to the overlay. Holding Ctr will lock it to aspect ratio while you resize.
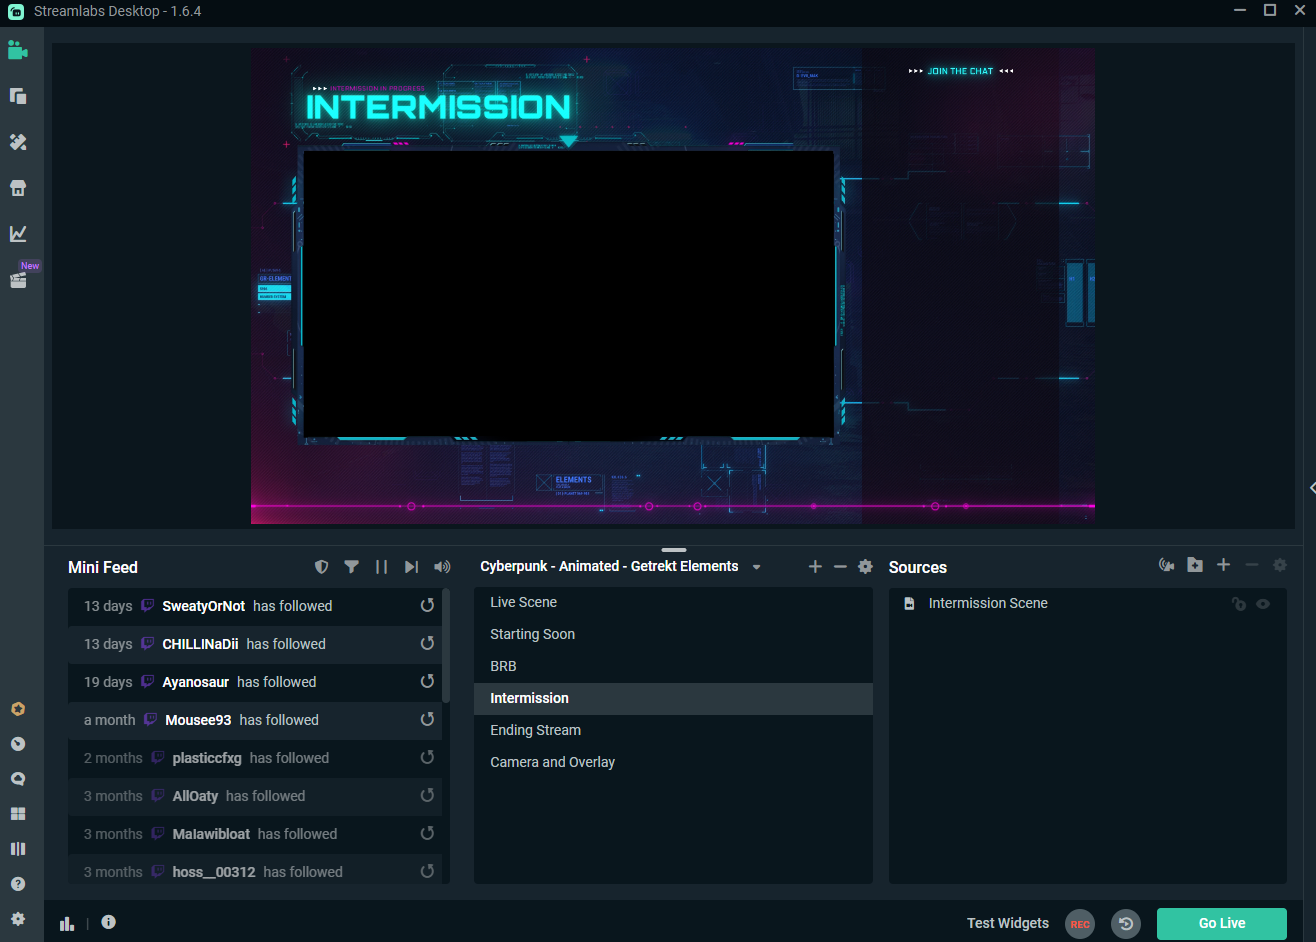
15. Moving to the Intermission Scene, there's a few things to change here as well. By default, we have Intermission 1 set in the collection, but you can swap it to 2 or 3 depending on preference. Just double click Intermission Scene and browse for the version you prefer.
16. The alertbox should already be set back in step 10, so the chatbox is left.
---If you are using a streamelements chatbox, it may be best to create a new overlay, add the intermission video/image you want as a bg, then add their chatbox widget on top inside your SE overlay editor, copy the overlay link into the browser source.
---If you are using the streamlabs chatbox here, get your streamlabs chatbox link from the SL widget dashboard, set the browser source to 350 x 900, and add your SL link here. The resolution may change depending on the Intermission screen variant.
17. If you’ve noticed that your transition hasn’t triggered as you’ve moved across the different scenes, locate your Scene Transitions dock, making sure Custom Transitions is selected in the dropdown, click on the gear icon on the right hand side.
18. Click Properties>Browse>Find the correct file. Make sure Transition Point Type = Time and Transition Point = 1500. Preview the transition with the button below, and if you are happy, click OK and switch scenes to test.
19. Do Final tests to make sure all your audio is set, games/capture cards are all set and click live to test it all out!
______
______
Streamlabs and Streamlabs Desktop
Alerts
1. Download and unzip the folder from your dashboard.
2. Locate the One Click folder in the root of your unzipped folder>Streamlabs>Alerts.
3. Making sure you are logged into your Streamlabs account, double click on the shortcut.
4. This will bring you to your streamlabs account, with an option to replace one of your themes. Scroll to the bottom and select Create next to “Create a new Widget Theme”.
5. Name the theme what you’d like, and click on Create again.
6. This will return you to the previous popup with all your current streamlabs themes, select the new one you just created. This will save our alertbox over the new theme you just created.
7. While in the themes menu, make sure the new theme you created is the active theme. Keep this tab open, as we will come back to this later after we’ve created our scene collection in SL Desktop
Streamlabs Desktop App
8. Open Streamlabs Desktop
9. Go to Settings by clicking the gear icon in the bottom left.
10. Locate and click on Scene Collections, then Import
11. Find the .OVERLAY file in your unzipped folder.
12. All of the assets should already be loaded.
Putting it all together
13. Starting in Live Scene, add your capture card/display/window/game capture source in the bottom layer here.
14. Go back to the tab you kept open in step 7 (your themes menu on streamlabs.com), refresh the page and connect the correct theme to the correct scene collection you just created (if you don’t see this option, login to your account on the Streamlabs Desktop App and refresh the page).
15. This connection should mean that the alertbox has the correct alerts attached to it, to test, just click on Test Widgets in the bottom right of your application.
16. Moving down to the Camera and Overlay scene, double click on camera and select your camera source.
17. Double click on Cam Overlay and choose a different overlay from the unzipped folders if you prefer.
18. Holding Alt and dragging an edge of the camera source in the preview window, will allow you to drag to crop your camera to fit your camera perfectly to the overlay. Holding Ctr will lock it to aspect ratio while you resize.
19. Moving to the Intermission Scene, there's a few things to change here as well. By default, we have Intermission 1 set in the collection, but you can swap it to 2 or 3 depending on preference. Just double click Intermission Scene and browse for the version you prefer.
20. Add the alertbox, by adding alertbox in your sources menu and positioning to preference.
21. Add the chatbox by adding source>chatbox and setting resolution to 350 x 900
22. Add your camera to the lowest layer and you are good to go
23. If you’ve noticed that your transition hasn’t triggered as you’ve moved across the different scenes, locate your the gear icon in the top right corner of your scenes dock and click it.
24. Click the pencil icon on your transition to edit the preferences>browse and locate your transition file.
25. Make sure Transition Point Type = Time and Transition Point = 1500. Preview the transition with the button below, and if you are happy, click OK and switch scenes to test.
26. Do Final tests to make sure all your audio is set, games/capture cards are all set and click live to test it all out!
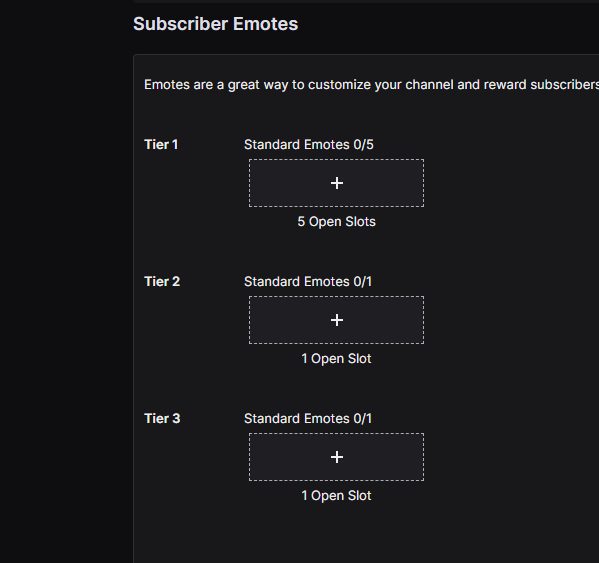
6. Emote Setup
Twitch
1. Login to Twitch
2. In the top right, click on your profile picture>creator dashboard
3. Click on Viewer Rewards>Emotes
For Sub Badges
1. Login to Twitch
2. In the top right, click on your profile picture>creator dashboard
3. Click on Settings>Affiliate>Subscriber Badges
Youtube
1. Go to your Youtube Membership page
2. Select Edit on your Badges and Emoji card
3. Change the name settings as you upload new Emojis for your members.
For Loyalty Badges
1. Go to your Youtube Membership page
2. Select Edit on Loyalty Badges
3. Upload per member level
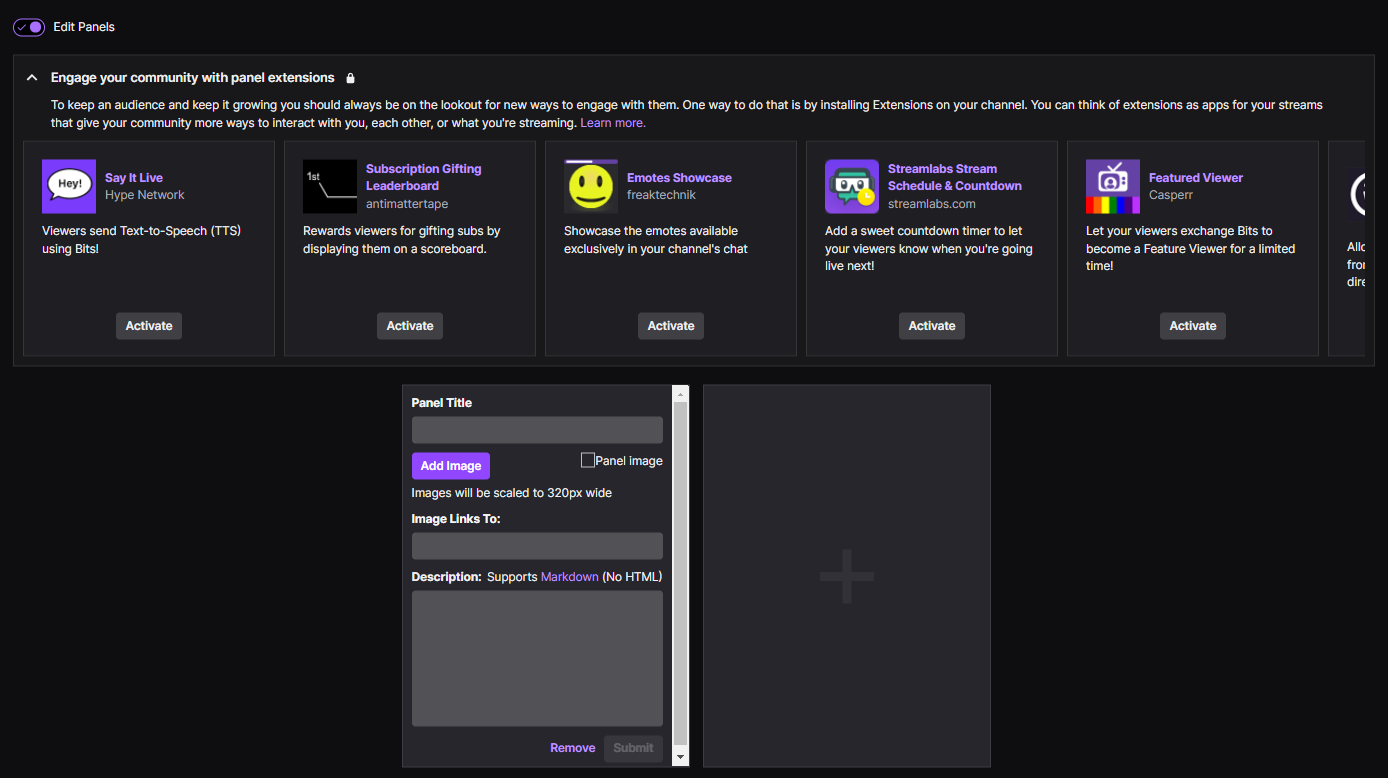
7. Panels Setup
1. Go to your Twitch channel. twitch.tv/(channelname)
2. Locate the Chat button>Find and click the Edit Panels
3. Click on the + button to add a new panel.
4. Add an Image Panel>Add Image>Locate the panel PNG you want to add.
5. If it links to anything add the link, and any text description you want to add under the panel.
6. Repeat for other panels you’d like to add to your channel.